When writing your novel, you want a program that can contain all the amazing ideas that are swirling around in your brain in one place. Literature & Latte’s Scrivener is designed to do just that. More than just a word processor, it provides a place to plot your novel, write it, hold all your research, and get it ready for publication. It’s a powerhouse of a program, but despite its many features new users don’t need to be overwhelmed. The basic functions are easy to grasp, allowing you to start writing without worrying about some of the more advanced features.
Overview
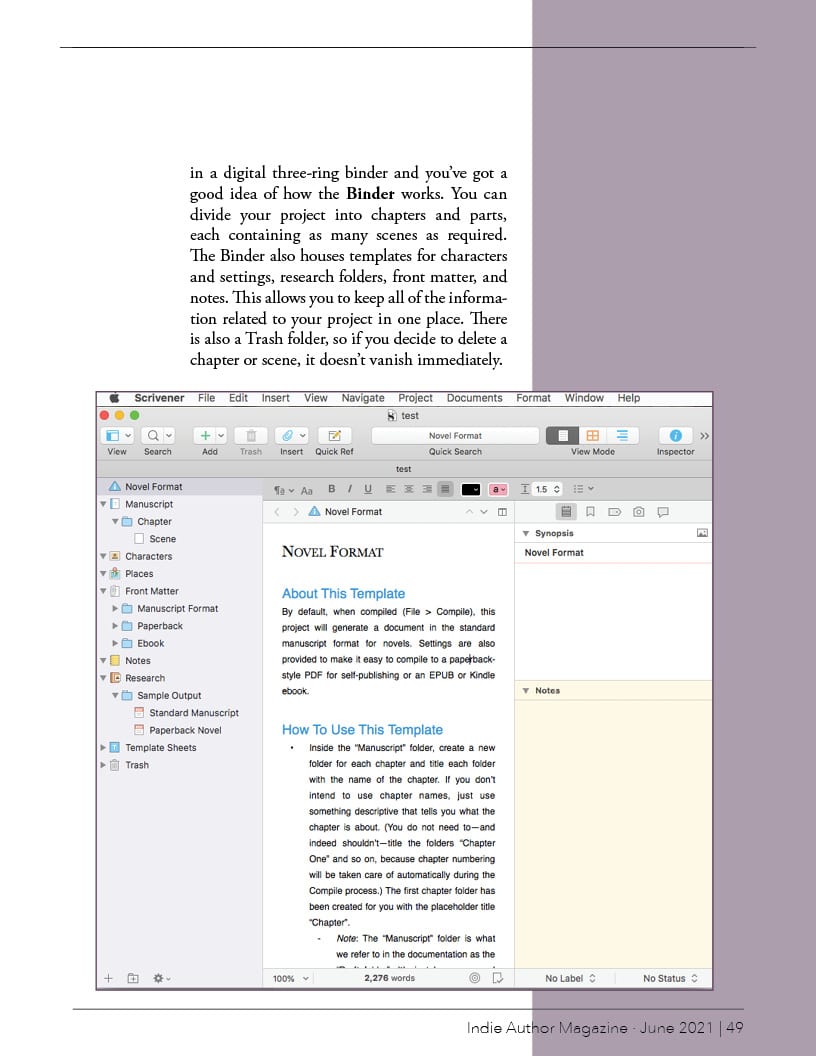
The main view of Scrivener is divided into three sections, the Binder, the Document, and the Inspector. Think of housing your project in a digital three-ring binder and you’ve got a good idea of how the Binder works. You can divide your project into chapters and parts, each containing as many scenes as required. The Binder also houses templates for characters and settings, research folders, front matter, and notes. This allows you to keep all of the information related to your project in one place. There is also a Trash folder, so if you decide to delete a chapter or scene, it doesn’t vanish immediately.
On the right hand side of the screen is the Inspector. The Inspector panel provides space for comments, bookmarks, story goals, or notes. You can add keywords, custom metadata, and labels. It also allows you to assign each scene a status so you know if it’s been written, edited, or still to do.
The middle portion of the screen, the Document, has three separate views: Scrivenings, Outliner, and Corkboard. The Corkboard shows your scenes as index cards, with either a preview of written text or the synopsis. You can easily shuffle the cards around as much as needed. This can be especially beneficial to those who tend to write out of order.
The second view is the Outliner. This is one of Scrivener’s greatest features. It gives you an overview of your project, broken into chapters and scenes. But depending on the level of data you’ve added, you can see all the details of your project in one spot. From the status of each scene to the POV, from word counts to subplots, this view can be as in depth or as minimal as you like.
The final view is Scrivenings, the place where you do your actual writing. If the screen is too cluttered for you to focus, you can switch to Composition mode, where you write in full screen with no distractions. The default is Typewriter mode, which keeps the line you are currently writing centered in the middle of the screen.
Advanced Features
Project Targets will automatically break down your deadline and overall word count goal into daily targets and let you schedule writing days. Customizable Status tags, and the intelligent use of color in Label tags let you see at a glance what needs to be drafted, edited, or sent to a critique partner. The history function shows you how many words you’ve written each day and month.
You can save story structures as templates, or import ones that others have created e.g. Save the Cat, or the W-plot. Templates can also be used for marketing checklists, release plans, and favorite story-structuring tools.
In theory, Scrivener can integrate with Grammarly or ProWritingAid to check spelling and grammar as you write. However, some authors have reported that ProWritingAid caused issues with their document, so if this is a critical feature for you, test how robust these integrations are for you and your usage during the trial period. If you use Plottr (featured in last month’s Technology article), it can output directly to Scrivener, so your plot points are lined up ready to start writing. Scapple, also by Literature & Latte, allows you to drag and drop your mindmaps directly into Scrivener.
Scrivener has a few advanced functions for revising your book as well. The first is the Snapshot feature, which allows you to take a “snapshot” of your document now, and later compare any changes you may have made. Segmentation allows you to slice and label snippets of text, and reorder the labelled snippets, scenes, and chapters using the Binder, Corkboard, or Outliner.
Creating your Output File
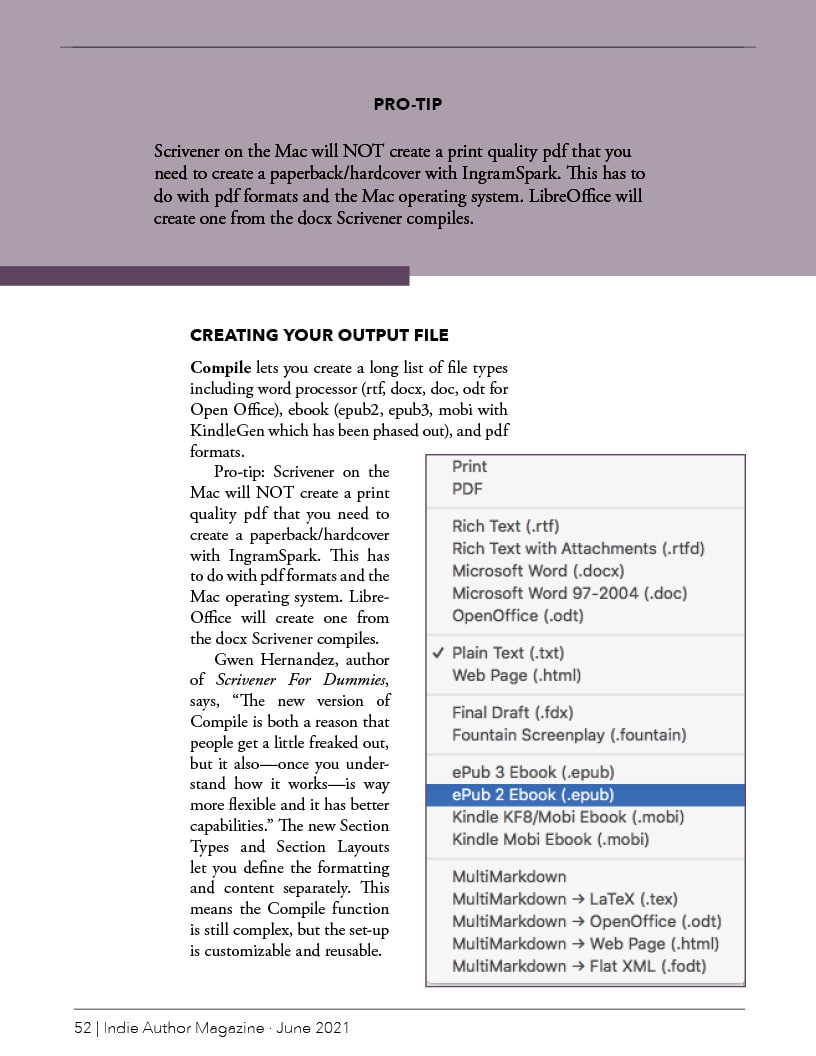
Compile lets you create a long list of file types including word processor (rtf, docx, doc, odt for Open Office), ebook (epub2, epub3, mobi with KindleGen which has been phased out), and pdf formats.
Pro-tip: Scrivener on the Mac will NOT create a print quality pdf that you need to create a paperback/hardcover with IngramSpark. This has to do with pdf formats and the Mac operating system. LibreOffice will create one from the docx Scrivener compiles.
Gwen Hernandez, author of Scrivener For Dummies, says, “The new version of Compile is both a reason that people get a little freaked out, but it also—once you understand how it works—is way more flexible and it has better capabilities.” The new Section Types and Section Layouts let you define the formatting and content separately. This means the Compile function is still complex, but the set-up is customizable and reusable.
Version 3
Scrivener3 was recently released for the Windows operating system. The newest Windows version has finally caught up to the Mac version released three years ago.
The new release supports 64 bit processing, making the program faster and more stable. System requirements can be found on Literature & Latte’s website.
Version 3 has more editing bells & whistles including:
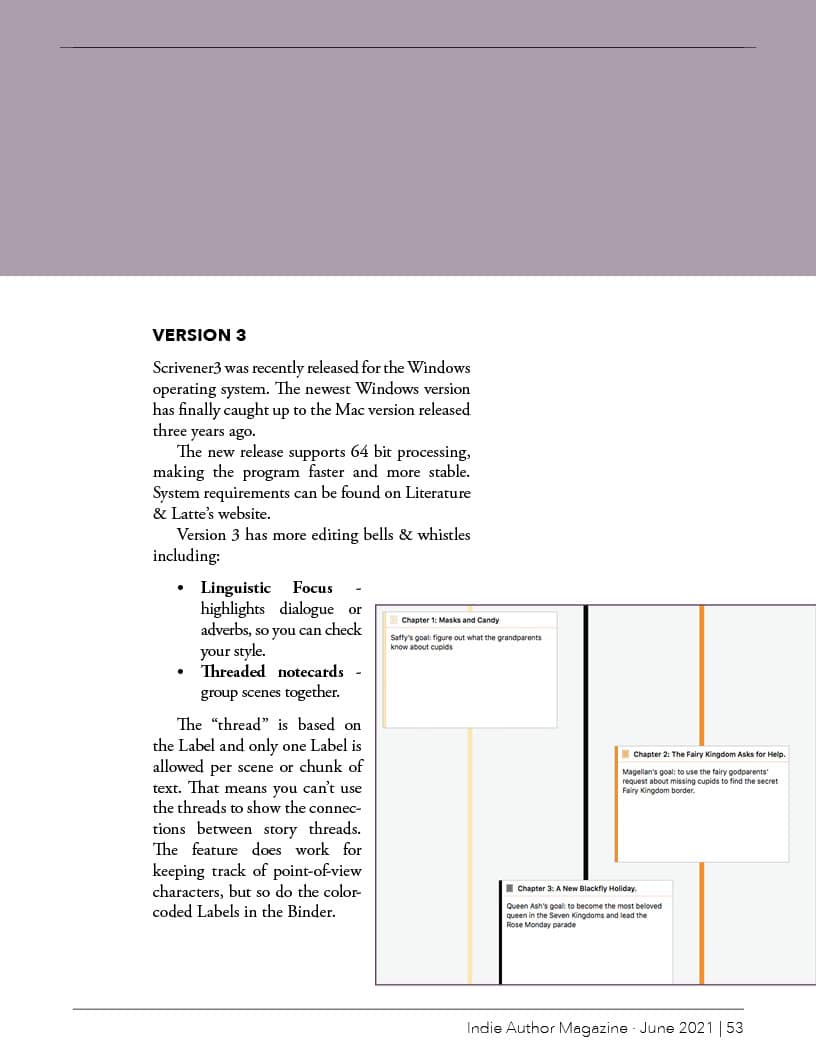
Linguistic Focus – highlights dialogue or adverbs, so you can check your style.
Threaded notecards – group scenes together.
The “thread” is based on the Label and only one Label is allowed per scene or chunk of text. That means you can’t use the threads to show the connections between story threads. The feature does work for keeping track of point-of-view characters, but so do the color-coded Labels in the Binder.
Pricing
Scrivener is a one-time purchase, currently priced at $49 USD. The Scrivener license covers all devices in your household on the same platform. If you have both Mac and Windows, you will need a separate license for each (available as a discounted bundle). There is also a generous 30-day free trial period, which lets you see if Scrivener is for you. This isn’t just 30 calendar days from when you start your trial period—Scrivener only counts the days you use the software, supporting your schedule.
Pro-tip for switching devices. “Close the project on your laptop and let it finish updating. Make sure you have an internet connection. Once the update is complete, you can open the file on another device. The “working copy” should be saved in Dropbox. This is the only supported cloud service for “working” files, which are constantly being updated with changes. Backups can go anywhere.
Remember, Scrivener doesn’t lock a collaborator out of the file while you are working on it. If you give a collaborator access, it’s important to communicate about who is working on the Scrivener file.”
Summary
Scrivener’s strongest feature is its customization. From changing your general text options as you write, to metadata, labels, and view, to compiling output options, you can make it work for you. There are a lot of resources to help you get started; from video tutorials and the user forums on Literature and Latte’s website, to free courses from Gwen Hernandez for both Windows and Mac users. If Scrivener matches your drafting or editing style, its powerful “heavy drafting” tools can be valuable on their own. If you want to use Compile to format ebooks and print books as well, it’s definitely worth exploring.
Laurel Decher

